This guide will help you configure and Update Your DeadPoly Server Name
Click here to order your DeadPoly server from Citadel today!
Customizing your DeadPoly server name is an important step in personalizing your dedicated server and making it easier for players to identify when browsing available multiplayer servers. Whether you are hosting a private server for friends, building a community around your server, or managing a public multiplayer environment, choosing an appropriate server name can help establish your server's identity and make it more recognizable to potential players. Your DeadPoly server name serves as a primary identifier that distinguishes your server from other available servers. A clear and memorable name can communicate your server's purpose, highlight your community, or indicate the type of gameplay experience players can expect. For example, you might choose a name that reflects your gaming group, emphasizes a particular playstyle, or incorporates your community's name to make your server stand out. In this guide, we will walk you through the process of configuring and updating your DeadPoly server name using your game server hosting control panel. You will learn how to access the relevant configuration settings, locate the server name parameter, enter your preferred name, and apply the changes so that your server can display the updated name. We will also cover important considerations when editing configuration files and troubleshooting common issues that may prevent your new server name from appearing correctly. Before proceeding, make sure you have access to your DeadPoly server's control panel and the configuration settings used to manage your server. It is recommended that you stop your server before modifying its configuration files to help prevent unsaved changes from being overwritten. After updating the server name, save your changes and restart the server if required for the new settings to take effect. Keep in mind that the exact configuration parameter and the way the server name is displayed may depend on DeadPoly's dedicated server configuration and the hosting environment. If the updated name does not appear immediately, verify that you modified the correct setting, saved the configuration file successfully, and restarted the server when necessary. By following this guide, you can configure a server name that better represents your DeadPoly community and ensure that your server is easier for players to recognize when joining or searching for multiplayer sessions.
Editing the Server Name
1. Log in to your Game Control Panel.
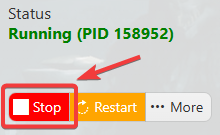
2. Before making any modifications, stop the server from running by clicking the Stop button.
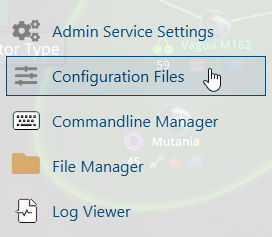
3. Navigate to the Configuration Files section.
4. In Configuration Files, look for the Game.ini file and click the Config Editor beside the Text Editor.

5. In the Config Editor, locate the Server Name parameter and change its value to your preferred server name.
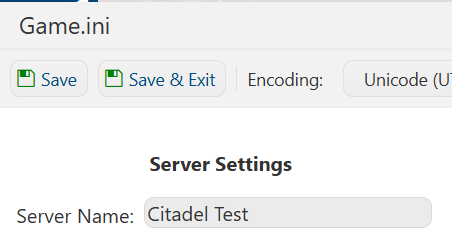
6. After editing, click Save to apply the changes.

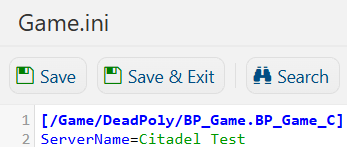
If you prefer to modify the server name directly within the configuration file instead of using the UI, click Text Editor next to Config Editor and make your changes there.
You can now start playing on your server.
Did the above information not work for you?
Please click here to contact our support via a ticket.