

This guide will show you how to configure global Palbox settings on your Palworld Server
Not a client yet? Order a Palworld Server today with Citadel Servers
The Global Palbox Settings on your Palworld server control how Palboxes function across the entire server and can affect how players manage, store, and interact with their Pals. Adjusting these settings can be useful for customizing the server’s gameplay experience, whether you want to make Pal management more convenient, change storage-related behavior, or create a more challenging progression system. By default, Palworld uses its standard Palbox configuration, but server owners can modify the available settings to better suit their community’s preferences. These options are particularly useful for servers with multiple players, as global changes can provide a consistent experience for everyone rather than requiring individual adjustments. In this guide, we’ll walk you through how to configure the Global Palbox Settings on your Palworld server, including where to find the relevant configuration file and how to safely adjust the available parameters. Before making any changes, we recommend creating a backup of your server configuration so you can easily restore the previous settings if needed.
Changing Global Palbox Settings
1. Log in to your Game Control Panel.
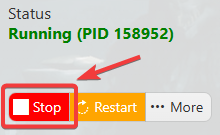
2. Before making any modifications, stop the server from running by clicking the Stop button.
3. Navigate to the Configuration Files section.
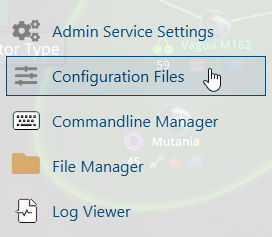
4. In Configuration Files, look for the Pal\Saved\Config\WindowsServer\PalWorldSettings.ini file and click the Text Editor beside the Config Editor.

5. In the Text Editor, Set Allow Global Palbox Import to True to allow players to import their Pals into the server.
Set Allow Global Palbox Export to True to allow players to export their Pals from the server.
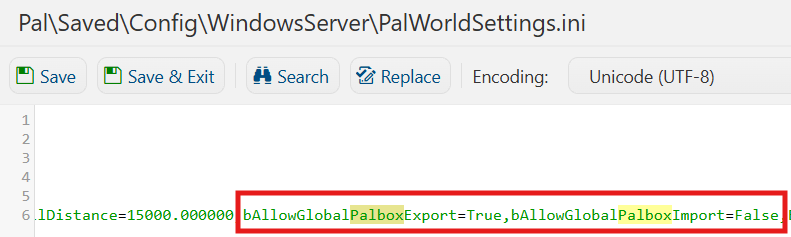
6. After editing, click Save to apply the changes.

You can now start playing on your server.
How to Use Global Palbox Import and Export on Your Palworld Server
1. Log in to your Game Control Panel and navigate to the Pal\Saved\Config\WindowsServer\PalWorldSettings.ini file.
Ensure that Allow Global Palbox Export is set to Enabled on your server before proceeding.
2. Launch Palworld and connect to your server.
3. Once you have joined the server, unlock the Global Palbox through the Technology Tree.
4. Press B to open the build menu, and place the Global Palbox.
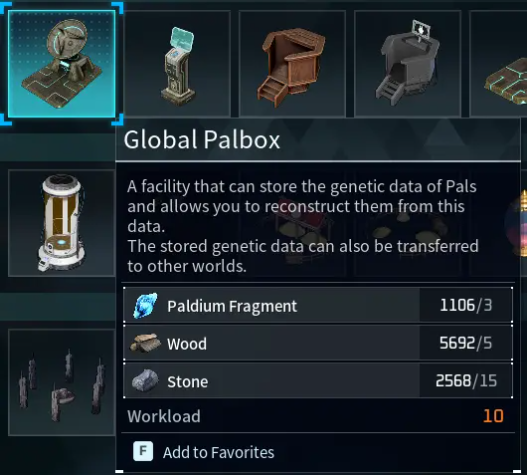
5. Press F to open the Global Palbox Menu. From there, click and drag the desired Pals from your Palbox into the designated purple window to add them to the Global Palbox. Once transferred, the selected Pals will be available through the Global Palbox for future use.
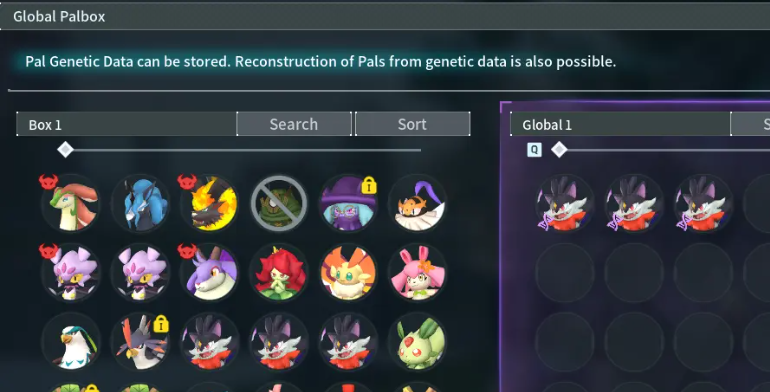
6. Close the Global Palbox Menu and return to the Main Menu. From the main menu, open the Global Palbox to verify that the selected Pals were successfully exported and are available for transfer.
Before importing the Pals into another server, ensure that the destination server has Allow Global Palbox Import set to Enabled.
This setting is required to allow exported Pals to be imported into the new server.
7. Connect to the New Server and progress through the Technology Tree to unlock the Global Palbox, if it has not already been unlocked.
Construct a Palbox at your desired location to access the Global Palbox functionality and prepare the server for importing your previously exported Pals.
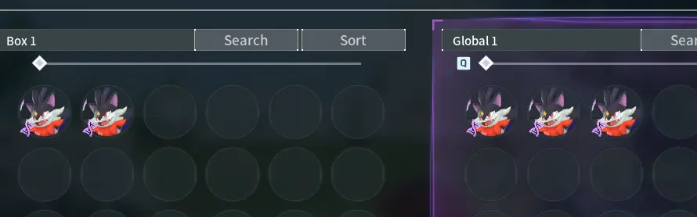
8. Open the Global Palbox Menu, then drag and drop the desired Pals from the purple window into the server’s Palbox. The selected Pals will be transferred from the Global Palbox and become available for use on the new server.
Did the above information not work for you?
Please click here to contact our support via a ticket.