

This guide will show you how to Configure Season Settings on your HumanitZ Server
Order a HumanitZ Server today with Citadel Servers
Customizing the season settings on your HumanitZ server allows you to control how seasons progress and tailor the gameplay experience to your preferences. In this guide, we’ll walk you through the steps to configure the season settings on your HumanitZ server.
Configuring Seasonal Settings
1. Log in to your Game Control Panel and navigate to your service.
2. Before making any changes, ensure that your server is fully stopped.
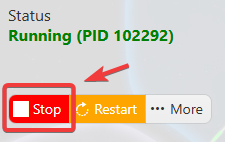
This helps prevent configuration changes from being overwritten or reverted to their default values.
3. Navigate to the Configuration Files tab to access your server’s configuration settings.
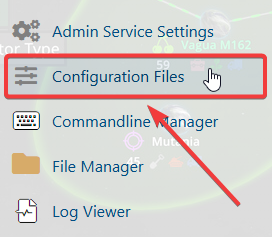
4. In the Configuration Files section, locate the gameserversettings.ini file, then click Config Editor next to it to open the configuration settings.

5. Navigate to the Starting Season section and choose the season you want to use when the server starts.
In the Days Per Season section, enter the number of days you want each season to last.
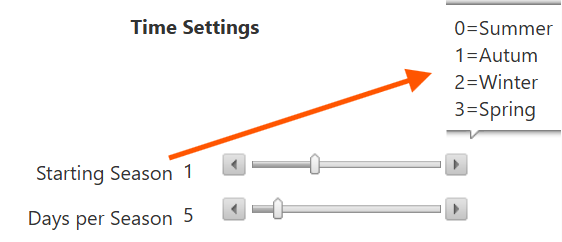
(Note: Days per season are tracked using In-game Days. The day's completion time can be adjusted by changing the Day/Night Length.)
6. Once you have finished editing the settings, click the Save button to apply the changes to your server.

If you prefer to modify the server name directly within the configuration file instead of using the UI, click Text Editor next to Config Editor and make your changes there.
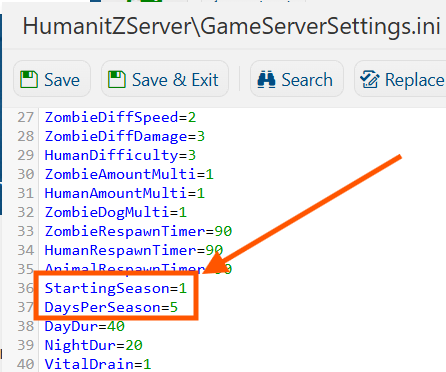
Using the Text Editor allows you to preserve custom configurations, such as installed mods and custom scenarios, without having them overwritten or affected by the preset settings in the Config Editor.