

Safe Zones in 7 Days to Die allow server administrators to establish protected areas where players can enjoy a safer multiplayer experience without the constant threat of hostile player interactions. Properly configuring these settings can help create a more balanced gameplay environment, particularly for servers that encourage cooperation, trading, base building, and community interaction. Whether you are hosting a cooperative survival server, managing a public multiplayer community, or creating a dedicated trading hub where players can interact peacefully, adjusting the Safe Zone settings allows you to customize how player protection works within your server. These settings can help prevent unwanted PvP encounters in designated areas, reduce conflicts between players, and provide designated spaces where community members can gather without worrying about being attacked by other players. Configuring Safe Zones is especially useful for server owners who want to establish specific gameplay rules and create a distinction between protected areas and locations where normal survival and PvP mechanics apply. By choosing the appropriate settings, you can tailor the multiplayer experience to suit your community's preferences while maintaining a more organized and enjoyable server environment. In this guide, we will walk you through the process of configuring the Safe Zone settings on your 7 Days to Die server using the Citadel Servers Game Panel. You will learn where to locate the relevant configuration options, how to modify the available Safe Zone settings, and how to apply your changes correctly so that your server follows your preferred player protection rules.
Configuring Safe Zones (Console)
1. Log in to your Game Control Panel.
2. Navigate to Web Console.
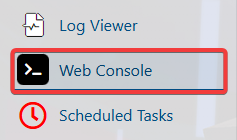
3. Enter your preferred command in the designated field.
| Command | Description |
gg PlayerSafeZoneLevel |
Displays the current value of the player's safe zone level limit. |
gg PlayerSafeZoneHours |
Gets the current value of the safe zone expiration. |
sg PlayerSafeZoneLevel |
Sets the player's level at which the safe zone applies. |
sg PlayerSafeZoneHours |
Changes the world time hours before the safe zone expires. |
Configuring Safe Zones (Config)
1. Log in to your Game Control Panel.
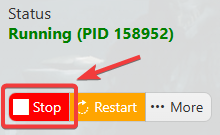
2. Before making any modifications, stop the server from running by clicking the Stop button.
3. Navigate to Configuration Files.
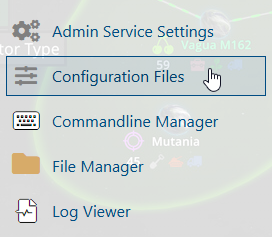
4. In the Configuration Files section, locate the serverconfigmain.xml file and click Text Editor to open and edit the file.

5. Locate the <!-- Difficulty --> section, then modify the PlayerSafeZoneLevel and PlayerSafeZoneHours values according to your preferred server settings.

| Property | Description |
| PlayerSafeZoneLevel | The player level equal to or lower at which the safe zone applies. |
| PlayerSafeZoneHours | The world time hours before the safe zone expires. |
6. After editing, click the Save button to apply the changes.

