1. Log in to your Game Panel to start your server.
2. Before making any modifications, stop the server from running by clicking the Stop button.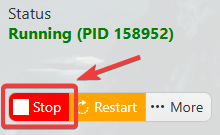
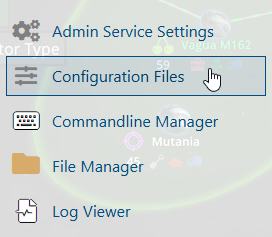
3. Navigate to the Configuration Files section.
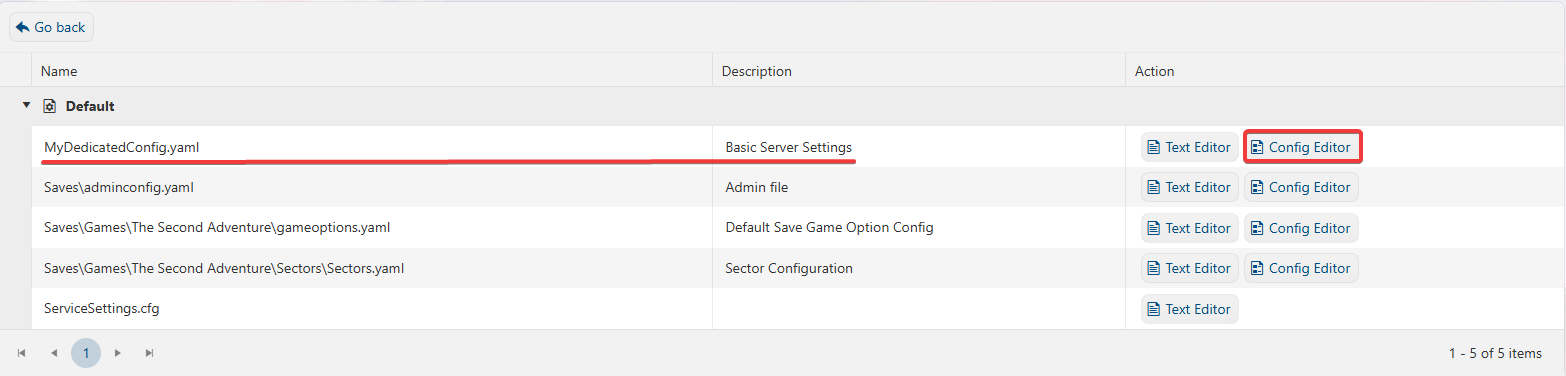
4. On the Configuration Files, look for MyDedicatedConfig.yaml file and click the Config Editor beside the Config Editor.
5. On the Config Editor, Look for Scenario To Load and choose your preferred Custom Scenario.
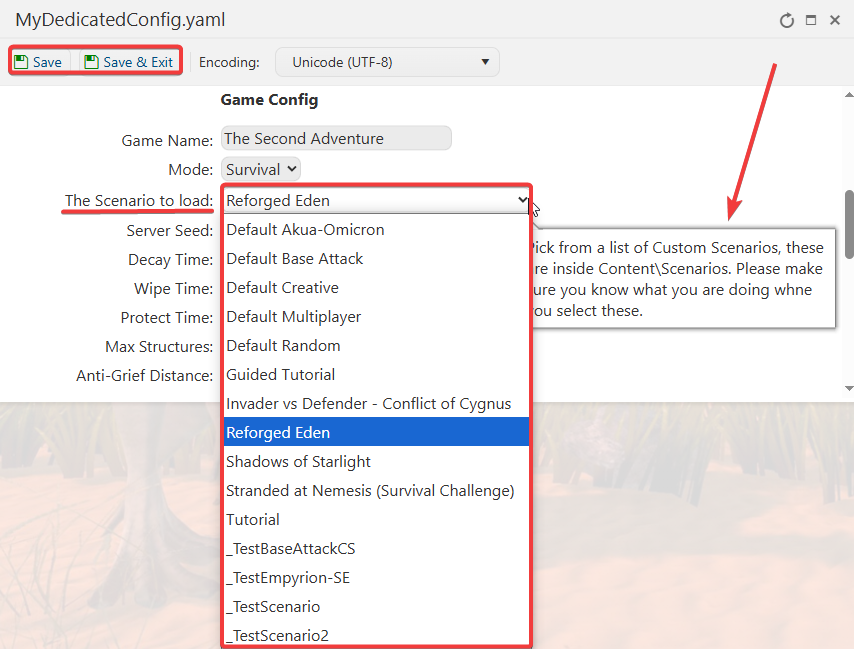
6. After configuring, click Save to apply the changes.
If you want to change the server name directly on file instead of using our UI, you can click the Configuration Files, look for the Text Editor beside the Config Editor and do the changes from there.
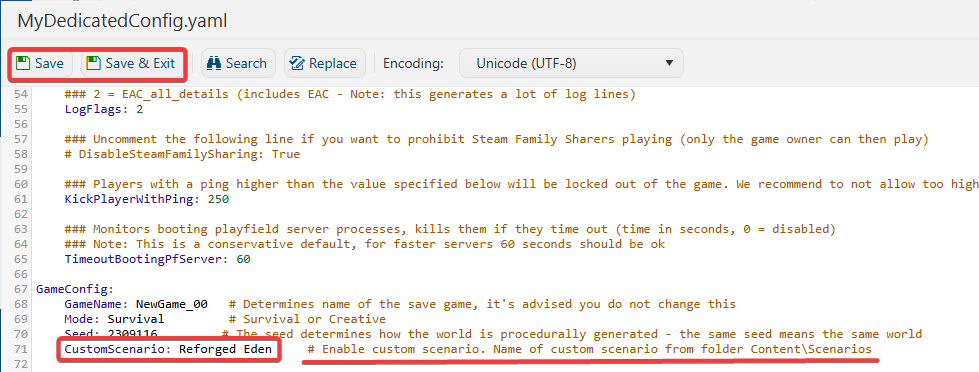
In this way, you are ensured that any custom changes that you made like mods and custom scenarios will be saved and not be affected by the Config Editor preset.
You can now start playing on your server and experience the adventure your custom scenario has to offer.
Did the above information not work for you?
Please click here to contact our support via a ticket.
