How to Host a CryoFall Server – Step-by-Step Guide for Colonists
If you’re ready to establish a thriving colony, manage resources, build technology, and survive the dangers of a distant world, hosting your own CryoFall server gives you complete control. Set your own rules, grow your community, and shape your colony exactly the way you want it.
This guide explains how to host your own CryoFall server and why Citadel Servers is an excellent partner for your survival and development journey.
Step 1: Choose a Reliable Hosting Provider
CryoFall combines survival, crafting, colony management, economy systems, and large-scale multiplayer progression. Because players can build bases, automate production, and develop technology trees over time, strong performance is essential.
Performance: High-clock CPUs and NVMe SSD storage ensure smooth base building, industry automation, and real-time colony activity.
Network Quality: Stable, low-latency connections keep PvE and PvP interactions responsive, especially during raids or community events.
Ease of Management: A clean control panel makes adjusting world settings, progression rates, PvP rules, wipe cycles, and server limits simple.
Support Availability: 24/7 support means you always have help available when issues arise.
Citadel Servers delivers all of these, offering the performance and uptime CryoFall’s long-term progression systems depend on.
Step 2: Order Your Hosting Plan
Setting up your Cryofall server is fast and easy:
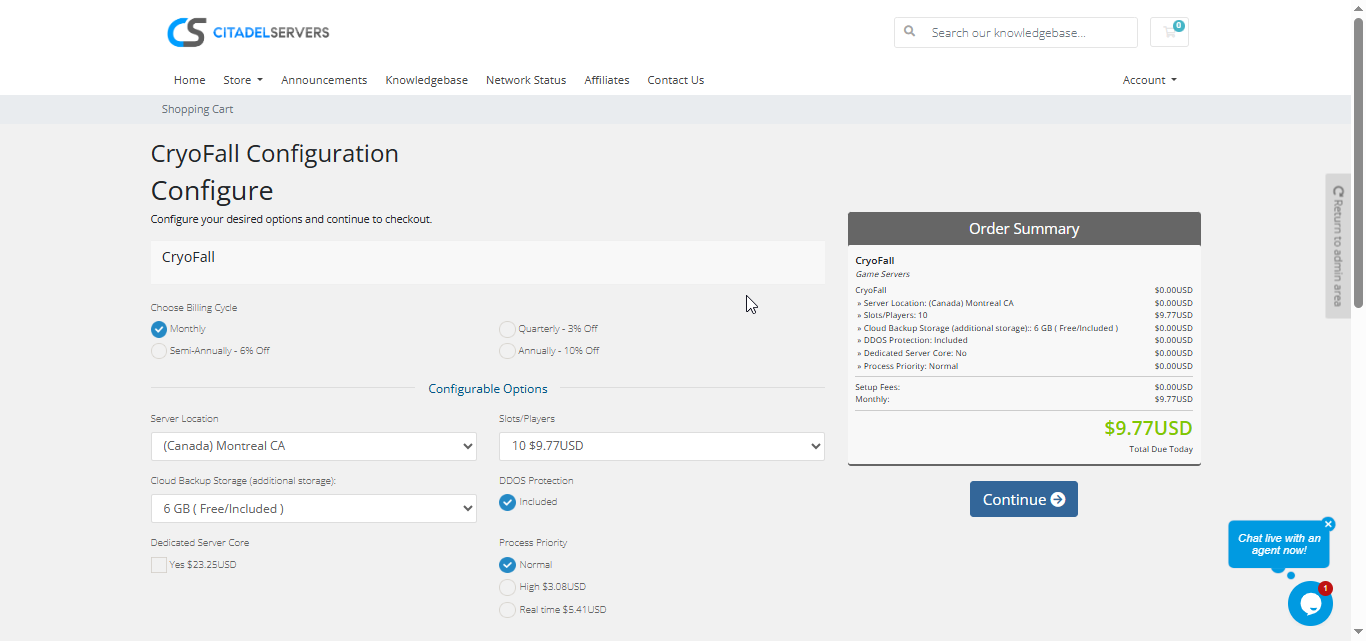
1. Go to the Cryofall hosting page.
2. Choose how many player slots you want.
3. Pick your server location closest to your player base for the best ping.
4. Select any extras, like process priority, premium support, etc.
5. Proceed to checkout and once payment is confirmed, your server deploys automatically.
You’ll receive an email with your control panel login details and connection info within minutes.
Step 3: Configure Your Server
Once your server is online, it’s time to personalize your Cryofall server:
- Follow our Quick Start Guide
Set your server name, admin password, and connection restrictions.
Configure experience gain, resource rates, PvP/PvE settings, wipe cycles, and world size.
Adjust technology progression, energy consumption, player limits, land claim rules, and raid options.
Upload custom configuration files or mods via FTP/SFTP if needed.
Everything is managed through the Citadel Control Panel, designed to be user-friendly for both new and experienced admins.
Step 4: Launch and Play
When your configuration is complete, start your server with one click and invite your community.
Players can join via the in-game server browser or by entering your server’s IP and port.
All settings can be configured directly from the Citadel Control Panel, designed to be easy for both new and experienced server operators.
Why Host with Citadel Servers
Hosting CryoFall with Citadel Servers gives you the stability, power, and freedom needed to support busy colonies, industrial production, and large communities. Our infrastructure ensures smooth gameplay and easy customization.
What Makes Us Stand Out
High-Performance Hardware: Dedicated CPU resources and NVMe SSD storage keep bases, automation systems, and colony activity running smoothly.
Global Data Centers: Select from worldwide locations to ensure low ping for all players.
Full Access & Mod Freedom: Upload, modify, and customize any server file to build your ideal CryoFall environment.
One-Click Mod Manager: Install, update, and manage mods or extensions instantly without manual file handling.
Automated Backups & Simple Restarts: Protect your colony’s progress and manage reboots directly from the panel.
24/7 Expert Support: Our technical team is always available to help you with setup, optimization, or troubleshooting.
Your colony deserves a strong and dependable foundation and Citadel Servers provides exactly that: power, flexibility, and reliability built for long-term CryoFall worlds.
Order Your Cryofall Server Now


