![]()
This guide shows the configuration settings users can change for their Project Zomboid server!
Click here to order your Project Zomboid server with Citadel today!
Configuration Settings give users the ability to modify the game's settings, moderate the server, spawn items, and many more. It's vital for servers that requires moderation and customization. This guide will give you the description of each settings and teach you how to change the configuration settings of your server!
optionName = value // Description
PVP = true //Enable PVP.
PauseEmpty = false //If true the server won't update if no players are on it (farming won't progress, etc.)
GlobalChat = true //Enable the Global Chat (/all command in chat).
Open = true //Open to all (no whitelist)
ServerWelcomeMessage = <rgb:1,0,0> Welcome to Project Zomboid MP test ! to chat locally press \"t\", to global chat press \"y\" or add \"/all\" before chatting  Press /help to have a list of server commands  <rgb:1,1,1></rgb:1,1,1></rgb:1,0,0> //Displayed message in the global chat when a client connect.
LogLocalChat = false //Log the local chat in the chat window (client side).
AutoCreateUserInWhiteList = false //If you server is open, this option will allow the server to create the user in whitelist if they entered the server with a password, so his username will be protected.
DisplayUserName = true //False = you won't see another players username on top of their head + their name won't be logged inside the local chat
SpawnPoint = 0,0,0 //Use this to define a custom spawn point instead of the random one from character creation.
SafetySystem = true //Allow the user to change their safety (if false and if PVP=true, then the safety will always be off).
ShowSafety = true //Allow the players to see if someone have his safety off with the skull icon.
SafetyToggleTimer = 100 //When the player disable safety it take some times before HE enable it (tho the other players see it instantly), define it here
SafetyCooldownTimer = 120 //Every time you hit someone in safety off, add this timer to the cool down before you can actually toggle safety off
SpawnItems = //Add spawning items to new player, ex : Base.Axe,Base.WaterBottleFull... (every item need to be separated by a ",")
DefaultPort = 16261 //Default port used by the server
Mods=BedfordFalls;AnotherMod... //Used to add mods to your server, like maps or other things, player will NEED to have this mods installed.
DoLuaChecksum = true //Do the lua checksum. Players with modified Lua files that differ from the server files will not be able to connect
Public = false //If true send the info of the server to pz.com to be visible in the public server list
PublicName = //Required for public server
PublicDescription = //Optionnal, for public server
MaxPlayers = 64 //Max players who can connect on the server (admin can by pass this)
PingFrequency = 10 //Time between each client ping, in second
PingLimit = 400 //Ping limit before being kicked, need to be 5 time over, in millisecond, 0 disbaled it.
HoursForLootRespawn = 0 //Enable loot respawn if > 0, then the zone need to be unseen for X (this parameter) hours before respawn loot in it.
MaxItemsForLootRespawn = 4 //For the loot respawn, if a container have more items than this number, it won't respawn loot (use it to limit respawn in safe house for example..)
HoursForZombiesRespawn = 0 //Enable zombies respawn if > 0, then the zone need to be unseen for X (this parameter) hours before respawn zombies on it, only on road.
IncreaseZombieRespawnBy=0 //Ammount of additional zombies you want to have spawned if HoursForZombiesRespawn > 0. Example, an area spawns a default of 10 Zombies. You have IncreaseZombieRespawnBy=20 -> The area will spawn 30 Zombies (10 naturally and 20 additional zombies).
There are two ways users can configure their Project Zomboid servers:
- Using the Configuration Files
- Using the in-game console
FIRST METHOD: Using the Configuration Files
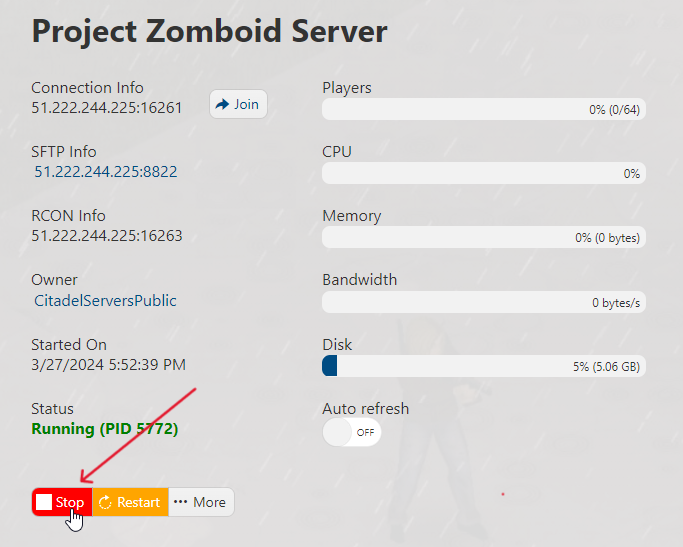
- First and foremost, login to the Game Panel (click this link for easy access) then go to your Game Service. You will see if your game server is running or not. Make sure to stop your server for now by clicking on the "Stop" button.
- Navigate to Configuration Files section, you will see a .ini file with the “Basic Server Settings” description. Click on the “Text Editor” button. The server options are set up via the ServerOptions.ini file in your Zomboid folder (
\Zomboid\Server)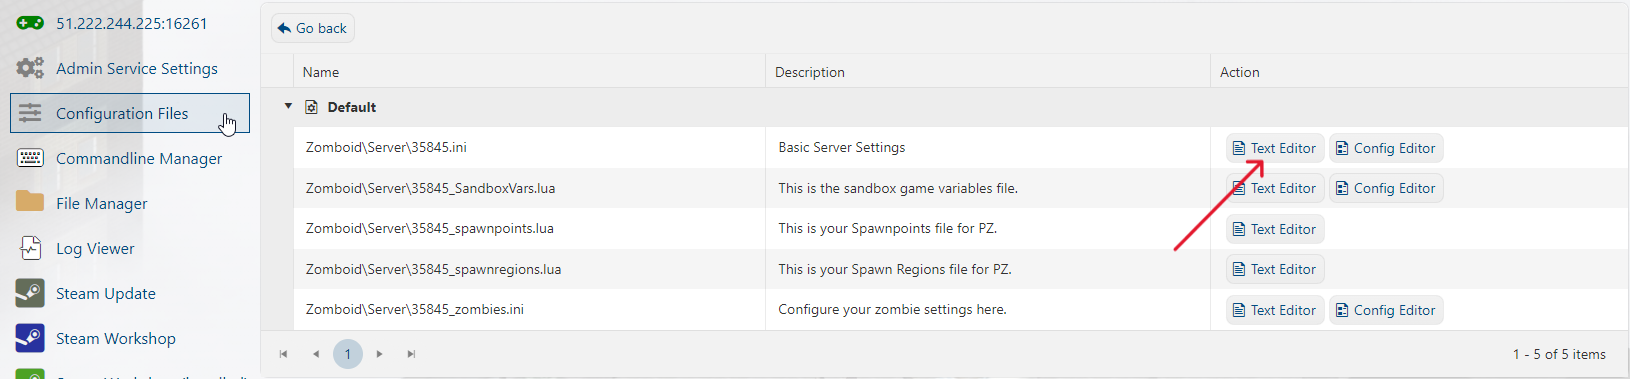
- Here, you will see all the configurations you can change and edit. Type the values of your choosing after the “=” of the
optionName. Lastly, press Save & Exit.
- Navigate back to your Game Panel, restart your server and enjoy playing with newly configured settings!
SECOND METHOD: Using the in-game console
- To use this method, you have to be logged in inside the game with admin level access. To do that, follow this guide and set yourself as admin.
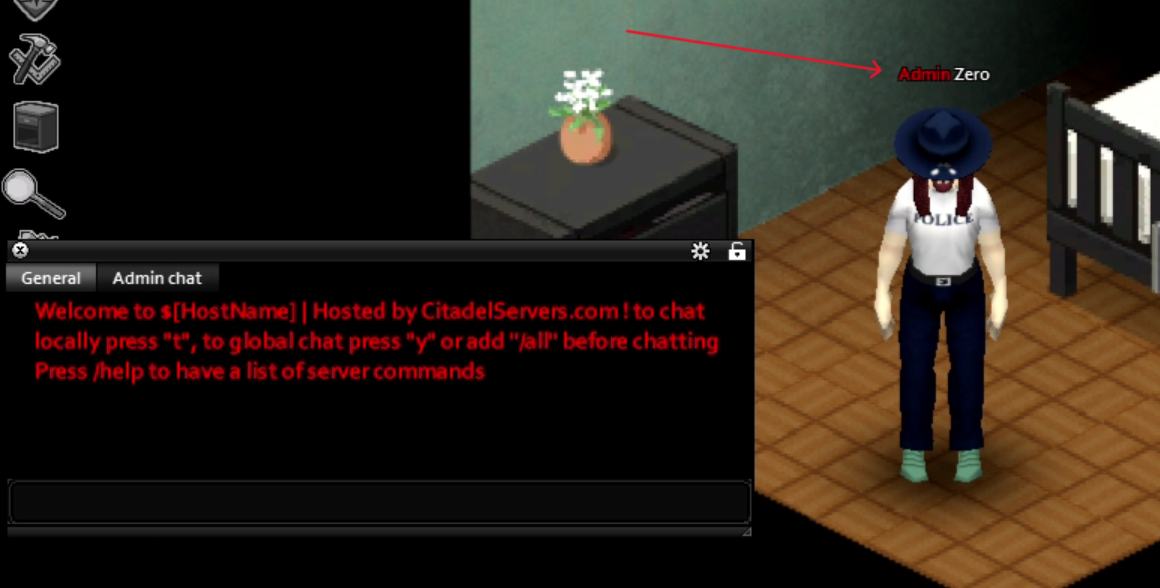
- Log in and connect to your Project Zomboid server. If you're unsure how to do that, check this guide out. Once connected, you should see that you have an Admin tag next to your name.
- Press "Enter" and type
/changeoption optionName=value.Replace theoptionNamewith the configuration names you want to edit. Replace value with the value you want that setting to be in, eg true/false or numeric values. In this example, I used theoptionName"PVP"and set its value to true.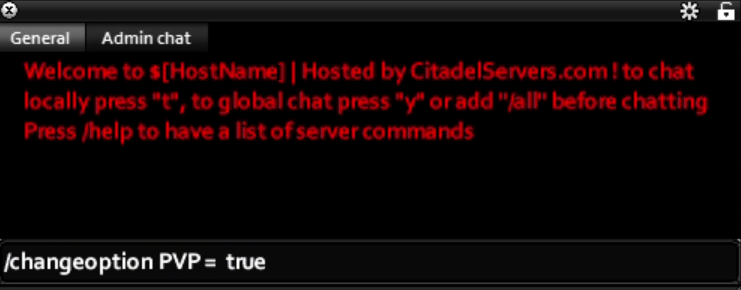
- Press"Enter"again and type
/reloadoptions. This saves and applies the configurations you just made.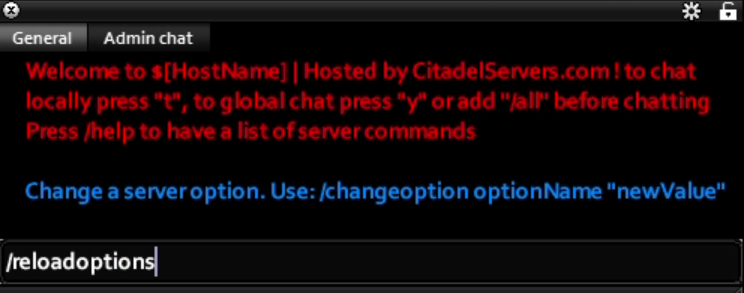
- Once you see this message, you're good to play in your server with newly configured settings!

FREQUENTLY ASKED QUESTIONS (FAQ)
I can't find my server in the in-game list. What do I do?
Make sure your server is up to date by following this guide. Have you also set an admin password in the Web Console? If not, follow this guide! Failing that, are you sure the name you are searching for is currently assigned? See this Configuration guide to make sure.
How do I connect to my Project Zomboid server?
There are three ways to connect to your Project Zomboid server. (Click this link for a more detailed guide) First is via your Game Panel and click the Join button next to the IP Address. The second way is to add the Connection Information to your Steam favorites and connect from there. The last way is to join in-game using the same Connection Information.
How do I update my Project Zomboid server?
There are several steps you must follow to properly update your Zomboid server. You can do this by following this guide.
How do I Set a Password for our Project Zomboid server?
You'll learn how to add a server password by following this step-by-step guide.
How do I setup Whitelist in my Project Zomboid server?
This guide shows you how to setup whitelist in your server.
Why won't the changes I make in Configuration Settings save?
Changes in the Configuration Settings while the server is running will not be applied. You must always stop the server first for the changes to save and take effect.
How do I add Admin users in my Project Zomboid server?
Follow this guide to add Admin users in your server. In the guide, you will see the different level of access and permissions of the admin levels.
My mods aren't working. Help!
Check this mod installation guide out and see if you've missed any steps. If you've followed them and still has issues with the mods, read up this troubleshooting guide. If that still fails, submit a ticket and our technical support team will assist you!
