
NOTE: You should stop your server before making any of these changes to it.
Choosing your method for installing mods
There are Four methods to install mods for your ARK server.
Installation via Ark remote and installation via the Commandline, the Commandline method is the preferred and fastest option.
This method is recommended as it allows you to visually see the mods being updated when the steam workshop mod updater is ran, it can also be scheduled like with server updates.
Unlike method 2, it is not run every time your server is started to lowers server startup times.
If this method does not work for you method 2 is recommended for ease of use as it automatically handles mod updating but increases server start times.
You can now have multiple mods at a time enabled, custom maps are considered one mod.
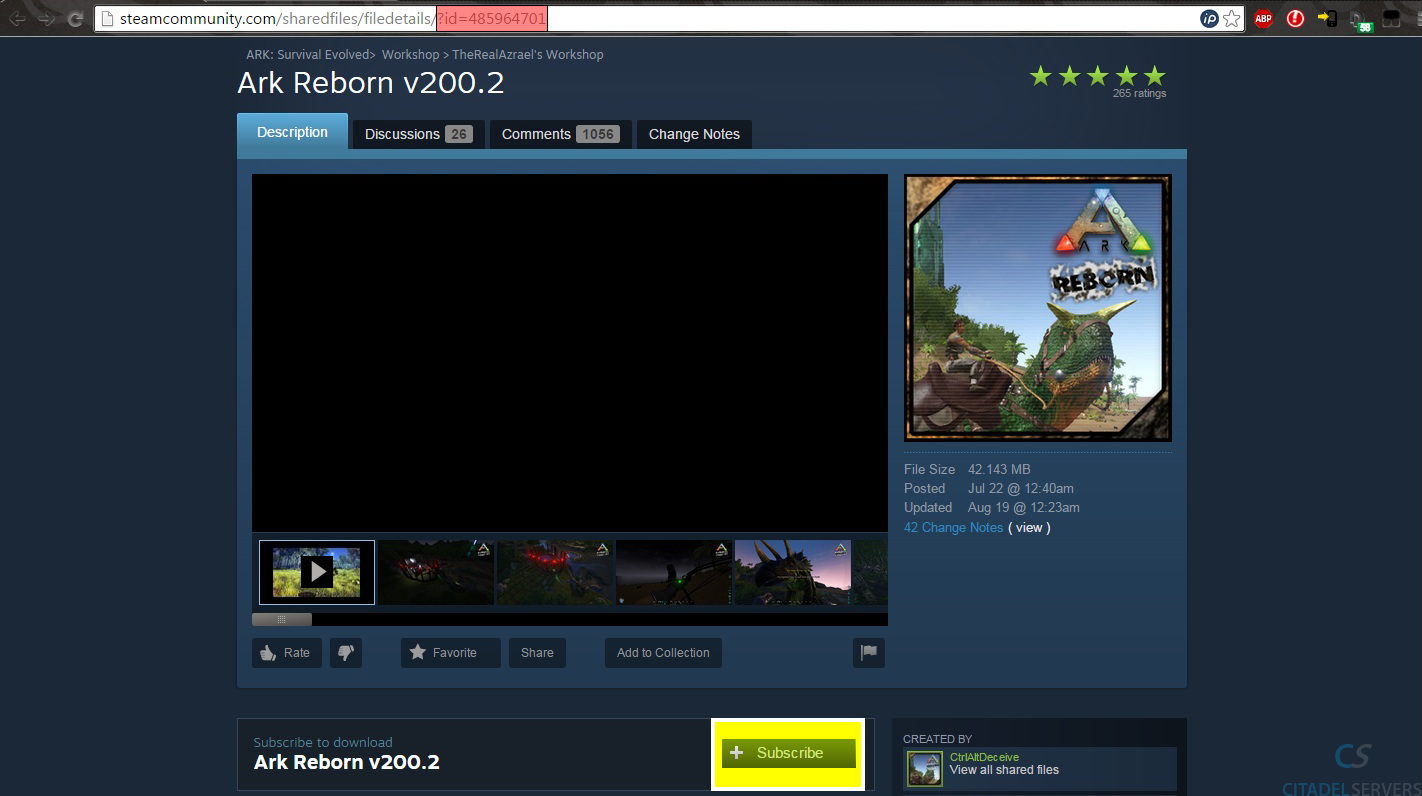
The workshop id is: 485964701
You will need to enter in the workshop ID which you can find at the end of the URL for a mod e.g. in this case it is:
http://steamcommunity.com/sharedfiles/filedetails/?id=485964701
So the commandline regarding these parts will look something similar to this:
TheIsland?QueryPort=port?Port=port?MultiHome=ipaddress?MaxPlayers=playerslots?RCONEnabled=True?RCONPort=port?AutoSavePeriodMinutes=5?listen? GameModIds=485964701 -server
If you have multiple mods, a comma seperates the mod files. Mod priority is from left to right so the first mod would be your "top" mod, the second mod would be your second mod loaded, if you only require one mod, make sure there is no comma and just the mod id.
e.g. 485964701,123456,123435
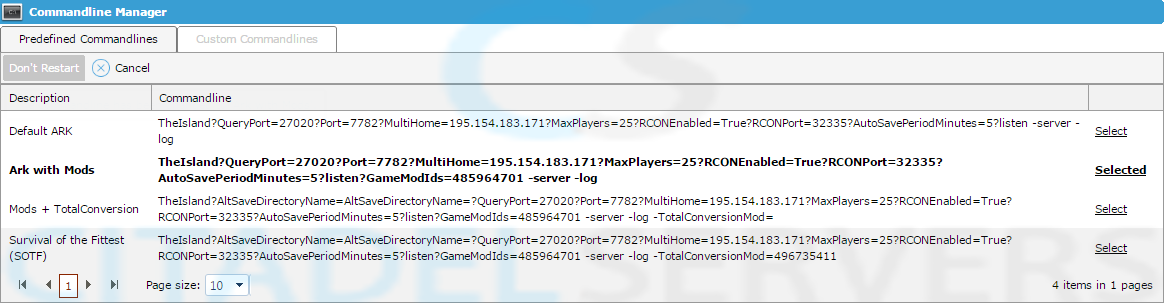
Hit "save". Then proceed back to the main view of your server. Click "Steam Workshop Mod Updater" Button.
You will now see a screen showing you your mods being downloaded one by one and if successful, This method can be scheduled also.
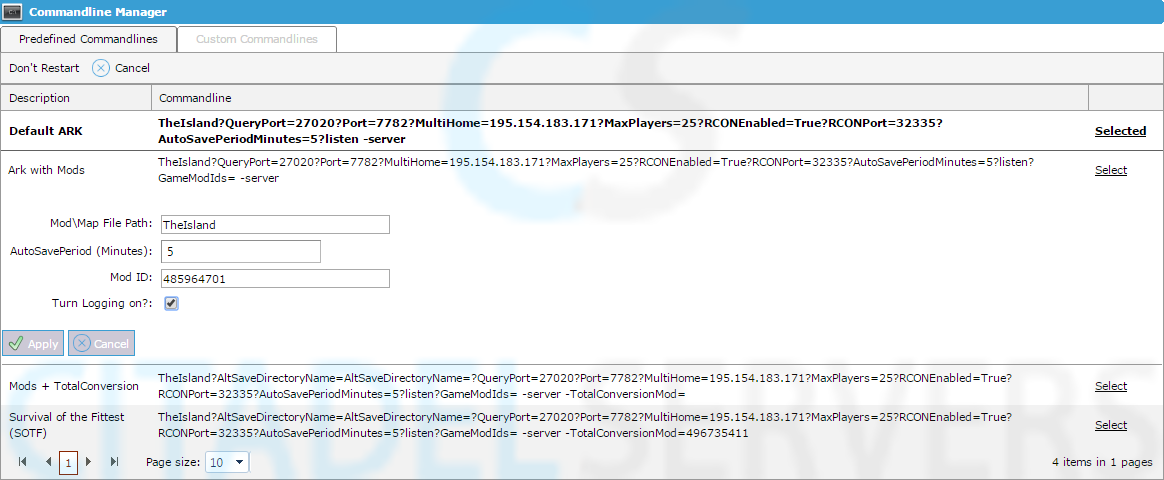
Notes: - Make sure you select the commandline or it will not be active. On the right side of the Commandline you will see "Select". Click that and it will change to "Selected".
You can now have multiple mods at a time enabled, custom maps are considered one mod.
The workshop id is: 485964701
You will need to enter in the workshop id which you can find at the end of the url for a mod e.g. in this case it is:
http://steamcommunity.com/sharedfiles/filedetails/?id=485964701
So the commandline regarding these parts will look something similar to this:
TheIsland?QueryPort=port?Port=port?MultiHome=ipaddress?MaxPlayers=playerslots?RCONEnabled=True?RCONPort=port?AutoSavePeriodMinutes=5?listen? GameModIds=485964701 -server
If you have multiple mods, a comma seperates the mod files. Mod priority is from left to right so the first mod would be your "top" mod, the second mod would be your second mod loaded, if you only require one mod, make sure there is no comma and just the mod id.
e.g. 485964701,123456,123435
Hit save and restart your server. The mods will be automatically downloaded\updated, this may cause some extra delay to the server starting due to downloading the mod data from the workshop.
Notes: - Make sure you select the commandline or it will not be active. On the right side of the Commandline you will see "Select". Click that and it will change to "Selected".
Method two is a new and prefered method, to install and use the ARK Remote to install the mods.
With this method you can install a mod with one click and use it to update the mods with one click.
Scroll down to "Method 1".
Method 2 - Installation manually
Exactly as it says, scroll down to "Method 2".
Method 2 - Installing mods with ARK Remote
First off, you need to install ARK Remote as shown in this guide.
The following guide will help you install mods onto your ARK: Survival Evolved server.
Log into your game panel and click 'stop' on your service, we suggest you save your server in game first. (This is very important)
Follow this guide to install ARK Remote if you have not done so already
With ARK Remote installed and started we can start the Mod Install
In Server Launcher downloaded in the guide, click the 'Mods' header
This will open up a new window where we can install our mods
Find the mod you want to install in the list.
For example: http://steamcommunity.com/sharedfiles/filedetails/?id=485347671
Step 6:
Copy the id="number" for our example it is: 485347671
Place this into the box and click 'Add > Mod'
Click on the mod you just added (in our case 'Strata Vis')
Click the 'Install / Update' button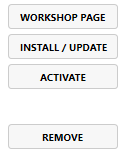
This will start the mod install.
When it finishes you will see similar to the following:
Downloading item 478525616 ...
Success. Downloaded item 47855616 to "Directory name"
Mod downloaded, Installing... (This can take awhile)
Mod Installed
Please Note:
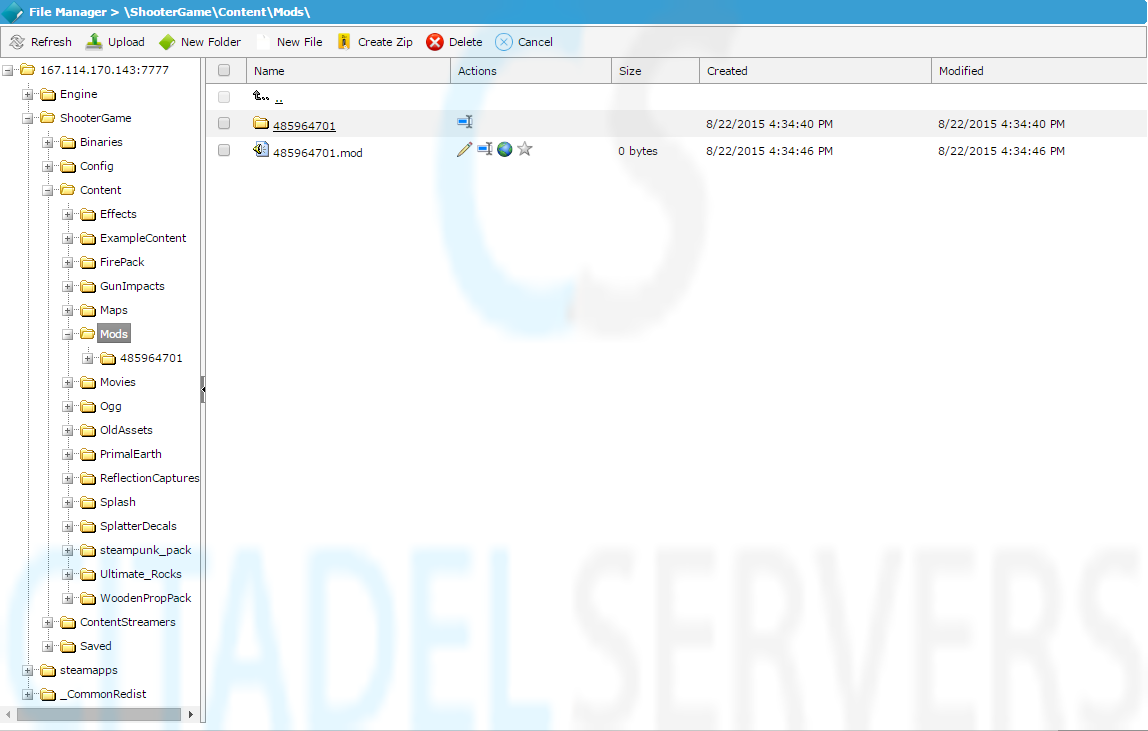
To confirm it downloaded you can check for files at:
File Manager > \ShooterGame\Content\Mods\
You have now downloaded your mods, please follow stage two of the guide for final installation
Activation of mods via Ark Remote\Server Launcher
There are two methods in which to enable\activate your mods,
you can simply click "Activate" just under the "Install/Update button" you just clicked as shown here:
Once this has been clicked your mod will be active and will be loaded when the server is started.
Your mod is now installed and active!
Alternative Activation via Commandline Method
The other method is adding the mods to the commandline, this may be prefered if you want to keep track of mods easily,
To add a mod to your commandline, please follow these steps here:
Select Commandline Manager from the icons.
Select the commandline ark with mods, of if your using a total conversion too, select the total conversion commandline.
Scroll down until you find "Mod ID"
Here you will add the mod ID (this tells the server and the users connecting what mods are loaded).
The ModID is the foldername you uploaded earlier. In our case: 485347671
Note:
If you want to run multiple mods simply seperate them by a ','
eg 485347671,485347672,485347673
Step 6:
Scroll down until you find 'Mod\Map File Path'
In this space we will be setting the load location of the map
NOTE: Do NOT change 'Mod\Map File Path' from 'TheIsland' if you aren't doing a map change.
These are setup like the following:
/Game/Mods/MODID/MapName
EG: /Game/Mods/485347671/StateraVis
The map name can be found inside the folder you uploaded it has the extension of .umap at the end.
Do not put the .umap extension into the CMD line.
You'll also want to add your map's ModID to 'MapModId'.
We have a more detailed guide on adding maps to your server here.
Click save\apply to save your commandline.
Start your server.
You can now have multiple mods at a time enabled, custom maps are considered one mod.
After downloading the mod, you need to find the files for it. Usually they are located in:
/SteamApps/common/ARK/shooterGame/Content/Mods/485964701
You need to get the mod folder and upload it to the above directory on your dedicated server files. This is best done via FTP but can be done with the file manager in our control panel.
After that is done, you just need to enter the workshop id and the mod directory into the commandline editor
The workshop id is: 485964701
You will need to enter in the workshop id which you can find at the end of the url for a mod e.g. in this case it is:
http://steamcommunity.com/sharedfiles/filedetails/?id=485964701
So the commandline regarding these parts will look something similar to this:
TheIsland?QueryPort=port?Port=port?MultiHome=ipaddress?MaxPlayers=playerslots?RCONEnabled=True?RCONPort=port?AutoSavePeriodMinutes=5?listen? GameModIds=gamemodids -server
If you have multiple mods, a comma seperates the mod files. Mod priority is from left to right so the first mod would be your "top" mod, the second mod would be your second mod loaded, if you only require one mod, make sure there is no comma and just the mod id.
Hit save and restart your server.
Did the above information not work for you? Please contact our support via a ticket.
Notes on Bugs\Issues:
You will not be able to directly edit the command line with this utility. You will see a warning upon connecting regarding this, it can be ignored.
Mods shown in the 'Mods' tab as installed have no effect on the server. If you see some in there which you do not want and they keep appearing, they can be ignored. This is a bug in the application.
Mods will only effect the server if their files are present in the server's "Mods" folder or being activated by the command line.
If your application crashes when you access the mods tab please see here for a fix
