How to add mods to your server in Don't Starve Together
Jump to navigation
Jump to search
2. Adding the ID to your server
Open up "dedicated_server_mods_setup.lua" file in the configuration files section. This is where you will define which mods from the steam workshop to be downloaded and used on your server.

This file is ran on boot and will download any mods or collection of mods that are set up in the file. Add your mod's Workshop ID into the file:
ServerModSetup("379628839")
ServerModCollectionSetup("379114180")
The mods you've added to "dedicated_server_mods_setup.lua" will be downloaded and installed to your mod folder, but they aren't enabled by default.
So to enable the mods on your server you have to "force enable" the mods.
To do this you will need to modify the file "modsettings.lua" to force enable the mods you've added to "dedicated_server_mods_setup.lua".
To do this, navigate to "modsettings.lua" (or create it if it doesn't already exist) and add this:

ForceEnableMod("workshop-379628839")
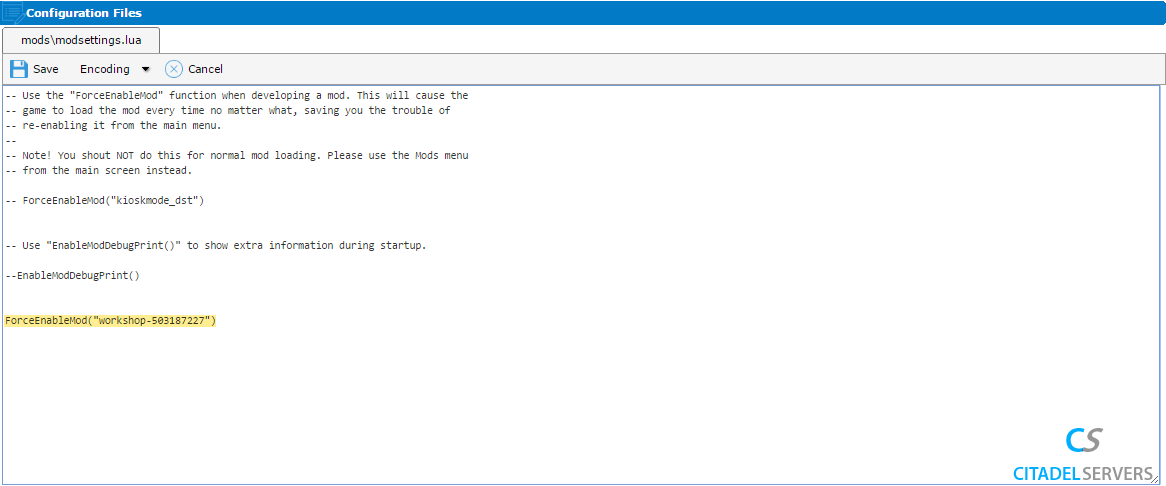
Note: To ensure that clients will be able to download the corresponding mods from the Workshop, you must not change the mod directory names.
Enabling Collections: Each Mod inside a collection need to be added manually with this method or the one below.
This guide will show you how to add mods to your server in Don't Starve Together.
How to Setup mods for your Don't Starve Together Server
Note:
Many mods on the workshop are outdated or incompatible with other mods, please check when the mod was last updated and its compatibility with DST: ROG (Not rog beta)
If you install mods which conflict or are outdated or for the singleplayer version, then this will cause server instability, server/client crashes or might corrupt the server.
1. Locating the mod's Workshop ID
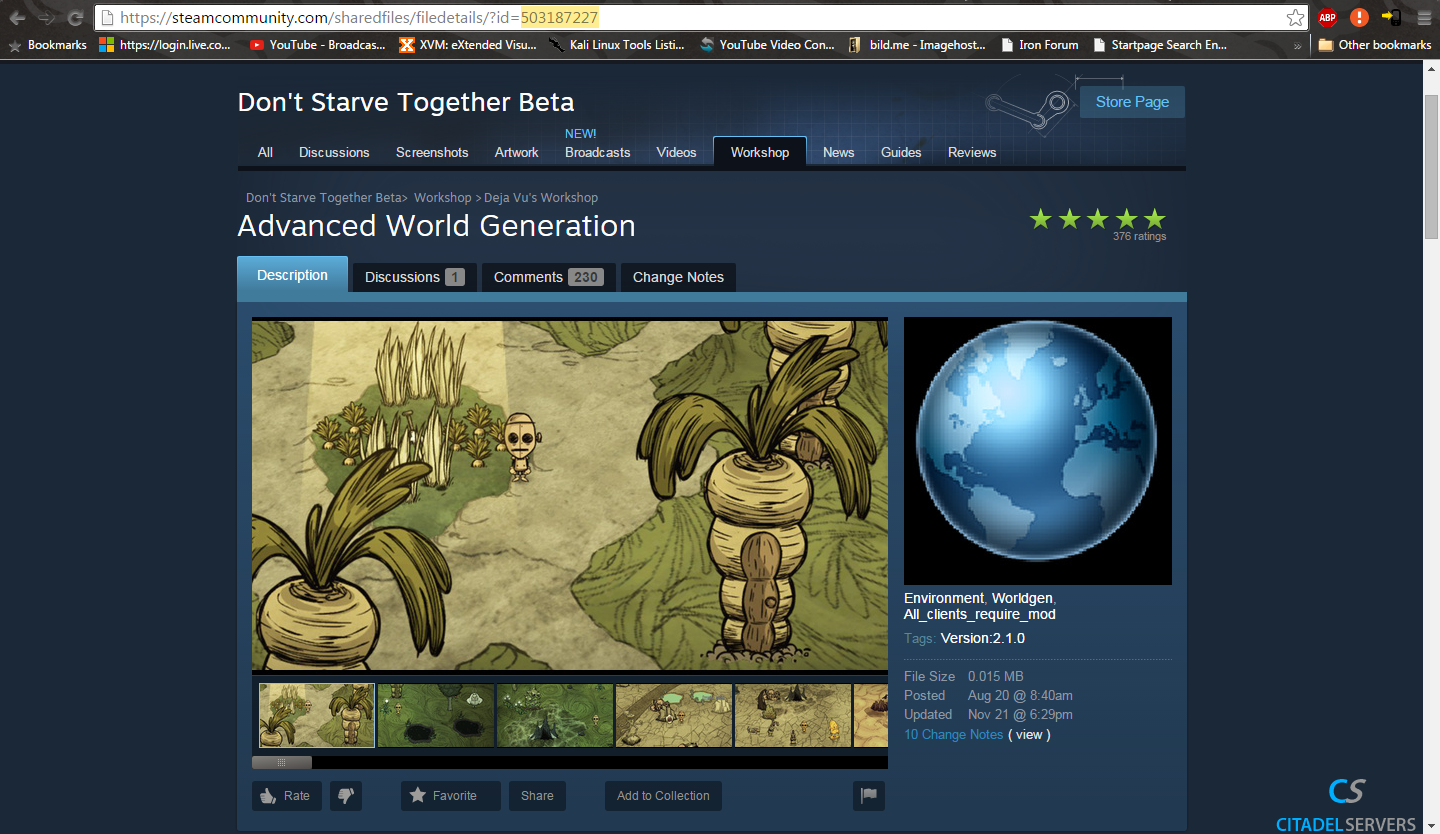
In order to install a mod in your control panel, you will first need to access the <a>Steam Workshop.</a> Once you have opened the Don't Starve Together Workshop, copy the Workshop ID number from your mod's link that you are browsing.
e.g. 379628839 in the example below.
Note: This is the mod's unique ID number (ID number is highlighted in the image)
2. Adding the ID to your server
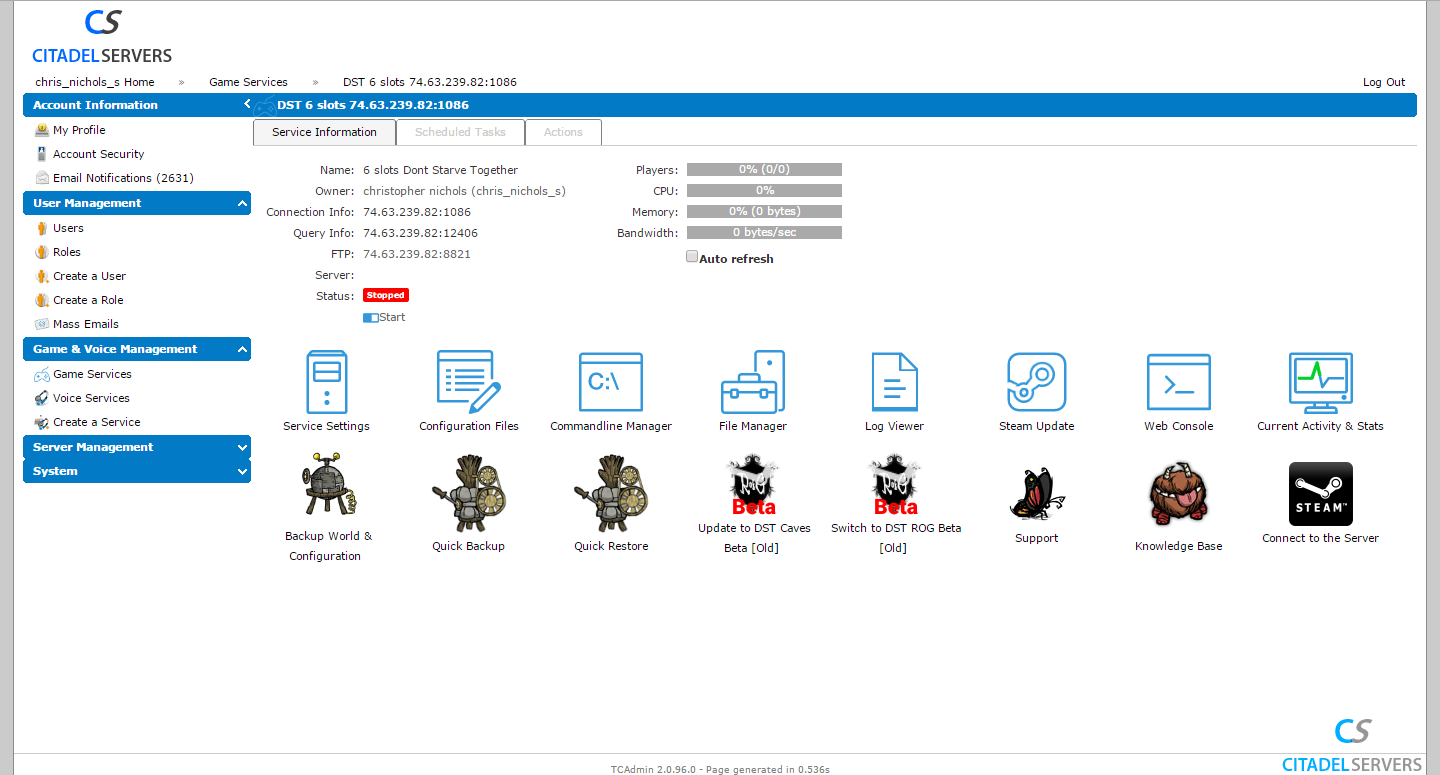
Now that you have a Workshop ID for the mod, the next step is to log-in to your Citadel Servers Game Control Panel.
After you've logged into your Citadel Servers Game Control Panel, you need to navigate to your server. Access the "Configuration Files" section as shown in the image:
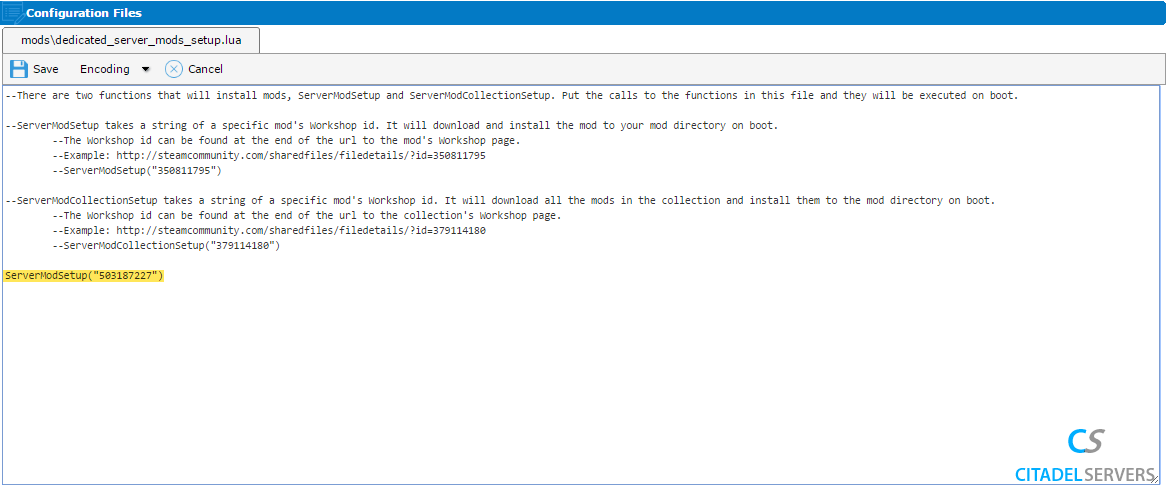
Open up "dedicated_server_mods_setup.lua" file in the configuration files section. This is where you will define which mods from the steam workshop to be downloaded and used on your server.

This file is ran on boot and will download any mods or collection of mods that are set up in the file. Add your mod's Workshop ID into the file:
ServerModSetup("379628839")

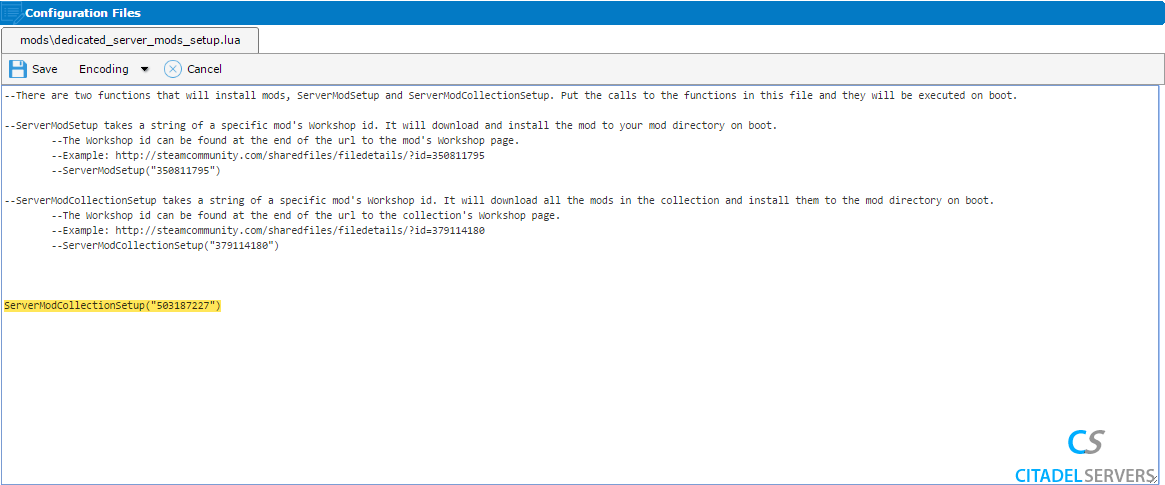
If you're trying to add a workshop collection, add the collection's ID into the file:
ServerModCollectionSetup("379114180")
The mods you've added to "dedicated_server_mods_setup.lua" will be downloaded and installed to your mod folder, but they aren't enabled by default.
So to enable the mods on your server you have to "force enable" the mods.
To do this you will need to modify the file "modsettings.lua" to force enable the mods you've added to "dedicated_server_mods_setup.lua".
To do this, navigate to "modsettings.lua" (or create it if it doesn't already exist) and add this:

ForceEnableMod("workshop-379628839")

Note: To ensure that clients will be able to download the corresponding mods from the Workshop, you must not change the mod directory names.
Enabling Collections: Each Mod inside a collection need to be added manually with this method or the one below.
4. [Advanced] Alternative method to force enable mods
An alternative advanced method of force enabling your mods is using a "modoverrides.lua" file. Use this method if your mod has custom configuration options.
To do this, go to “modoverrides.lua” (or create it if it doesn't already exist) and add this:
return {
["workshop-379628839"] = { enabled = true },
["workshop-361336115"] = { enabled = true,
configuration_options =
{
hunt_time = 6,
}
},
["workshop-336882447"] = { enabled = true }
}
Replace the Workshop ID's in the example above with the ID's of your mods. Make sure to keep the table structure intact.
Add any configurable options your mod might require with "configuration_options", as seen in the example above.
Note: Dedicated servers can override the mod config options to non-valid options using this method.
In this example, 6 is not a normal option for the hunt_time in the Hunt game mode mod.
Errors and bugs
Question: Why are my mods not working? I get Failed GetFileResponse in my console.
Question: Why are my mods not working? I get Failed GetFileResponse in my console.
Example:
[00:00:32]: Failed GetFileResponse
This error means there is a problem with the steam servers. This issue is usually resolved within a few hours and rarely occurs.
Unfortunately, this is out of CitadelServers' scope of support nd Klei's hands as it's Steam's workshop servers that are at fault rather than the game or our DST game servers.
Unfortunately, this is out of CitadelServers' scope of support nd Klei's hands as it's Steam's workshop servers that are at fault rather than the game or our DST game servers.
Need further help?
Contact us via a support ticket or read the offical wiki page:
