Difference between revisions of "Configuring The Server Manager"
Jump to navigation
Jump to search
Step 1: Configure The Server
Go ahead and log into the Citadel Servers Game Panel
Next, select the Configuration Files tool
(Created page with "<br /><br />In this article, we will cover a basic setup for your Empyrion - Galactic Survival dedicated server using a 3rd party tool.<br /><br /></div> <div style="text-alig...") |
|||
| Line 8: | Line 8: | ||
[[File:Servermanager.png]]<br />Empyrion Server<br />Manager<br /><br /><br />Once that's done, start the server<br /><br /><br /><br />[[File:S8.png]]<br /><br /><br /><br />Now load up the Web Console tool<br /><br />[[File:RemoteConsole.png]]<br />Web Console<br /><br /><br /><br />[[File:S4.png]]<br /><br /><br />What we want from here is the Telnet port, which is highlighted in the image above, so we can connect the server manager to the server.<br /><br /><br />After you grab the telnet port, open the option.txt file that came with the server manager<br /><br /><br />[[File:S5.png]]<br /><br /><br />Input the ip from "Connection Info:" in the main panel, the telnet port we grabbed earlier, and the telnet password you set for your server.<br /><br /><br /><span style="font-size: small;"><strong>Step 2: Use The Manager</strong></span><br /><br /><br />Now, start the server manager, and you'll see a picture attached below:<br /><br /><br />[[File:S6.png]]<br /><br />After that, you're all set to monitor and restart the server remotely.<br /><br /><br /><br /><br /></div> | [[File:Servermanager.png]]<br />Empyrion Server<br />Manager<br /><br /><br />Once that's done, start the server<br /><br /><br /><br />[[File:S8.png]]<br /><br /><br /><br />Now load up the Web Console tool<br /><br />[[File:RemoteConsole.png]]<br />Web Console<br /><br /><br /><br />[[File:S4.png]]<br /><br /><br />What we want from here is the Telnet port, which is highlighted in the image above, so we can connect the server manager to the server.<br /><br /><br />After you grab the telnet port, open the option.txt file that came with the server manager<br /><br /><br />[[File:S5.png]]<br /><br /><br />Input the ip from "Connection Info:" in the main panel, the telnet port we grabbed earlier, and the telnet password you set for your server.<br /><br /><br /><span style="font-size: small;"><strong>Step 2: Use The Manager</strong></span><br /><br /><br />Now, start the server manager, and you'll see a picture attached below:<br /><br /><br />[[File:S6.png]]<br /><br />After that, you're all set to monitor and restart the server remotely.<br /><br /><br /><br /><br /></div> | ||
| − | [[Category: | + | [[Category:Empyrion]] [[Category:Empyrion Server Help Articles]] |
Latest revision as of 15:38, 19 July 2019
In this article, we will cover a basic setup for your Empyrion - Galactic Survival dedicated server using a 3rd party tool.
Step 1: Configure The Server
Go ahead and log into the Citadel Servers Game Panel
Next, select the Configuration Files tool
Then move into the "Dedicated.yaml" file to edit the "Telnet" options
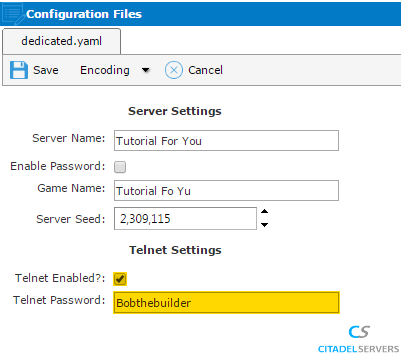
Once done, go ahead and go back to the main page:

Download the "Empyrion Server Manager" via the button in the panel:

Empyrion Server
Manager
Once that's done, start the server
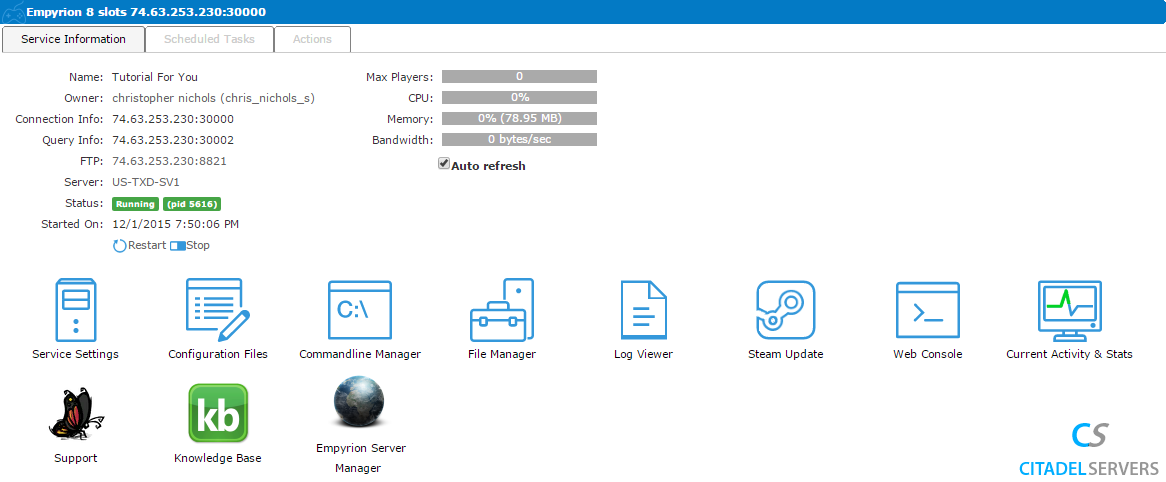
Now load up the Web Console tool

Web Console
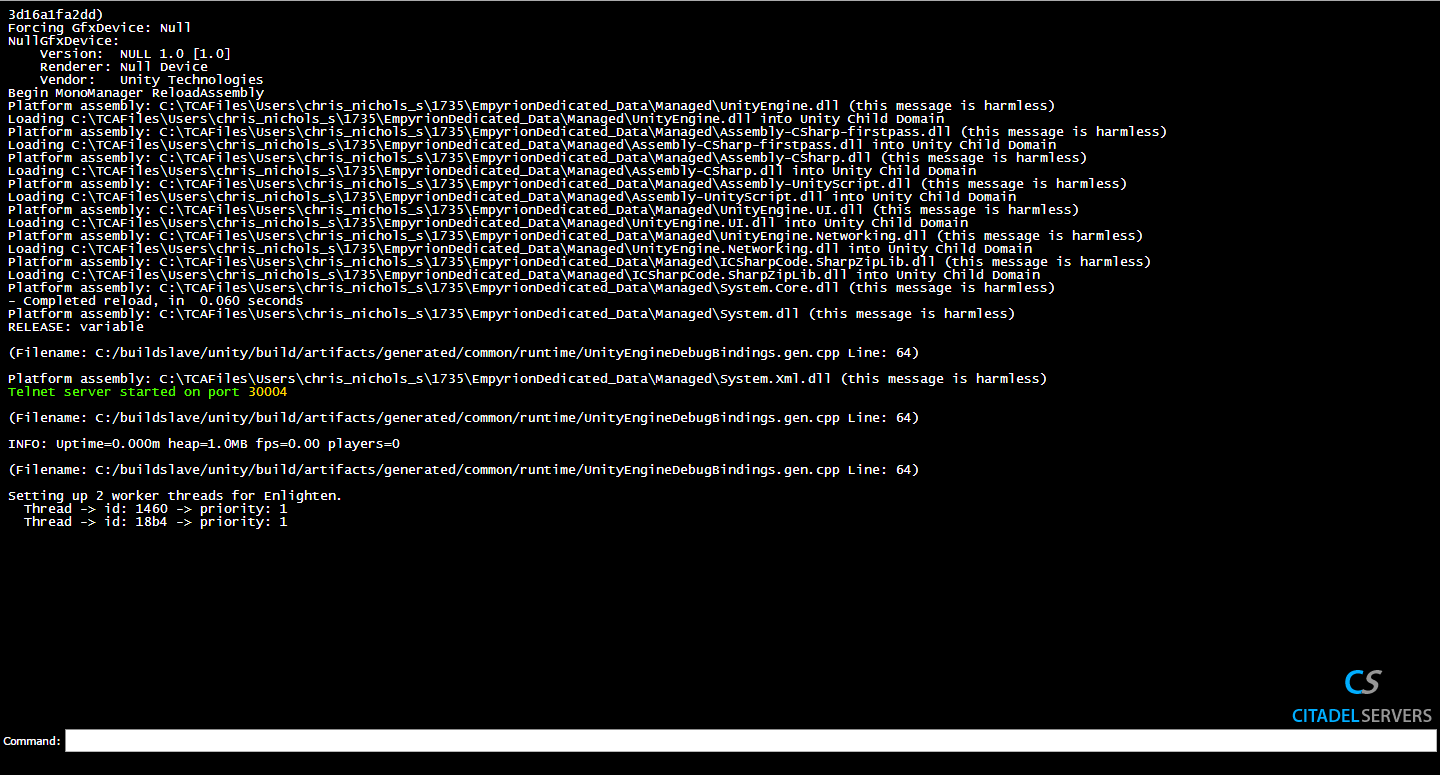
What we want from here is the Telnet port, which is highlighted in the image above, so we can connect the server manager to the server.
After you grab the telnet port, open the option.txt file that came with the server manager
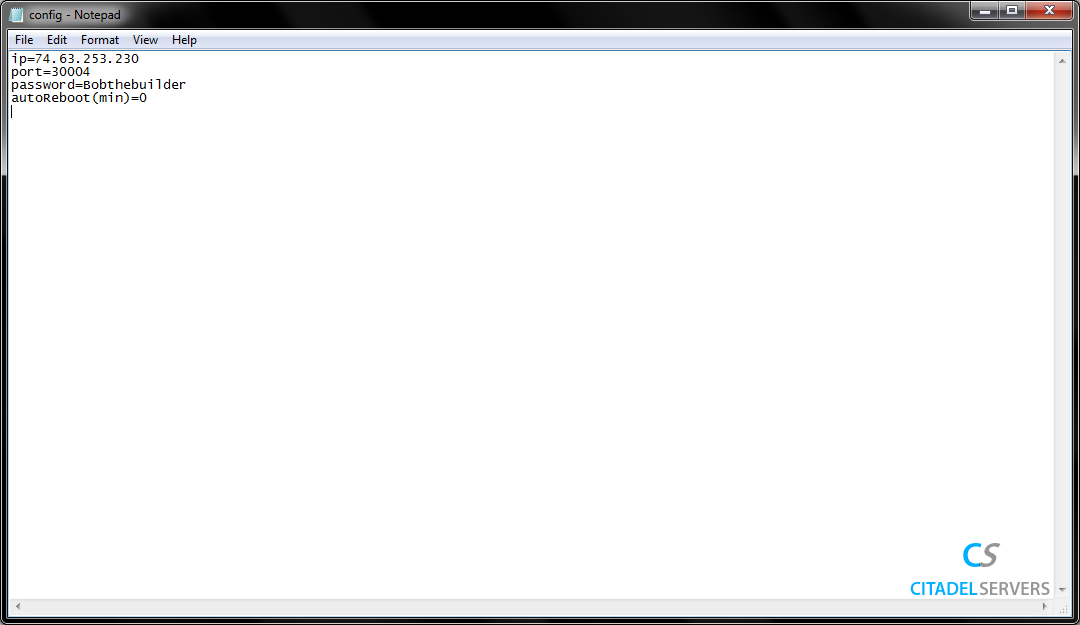
Input the ip from "Connection Info:" in the main panel, the telnet port we grabbed earlier, and the telnet password you set for your server.
Step 2: Use The Manager
Now, start the server manager, and you'll see a picture attached below:
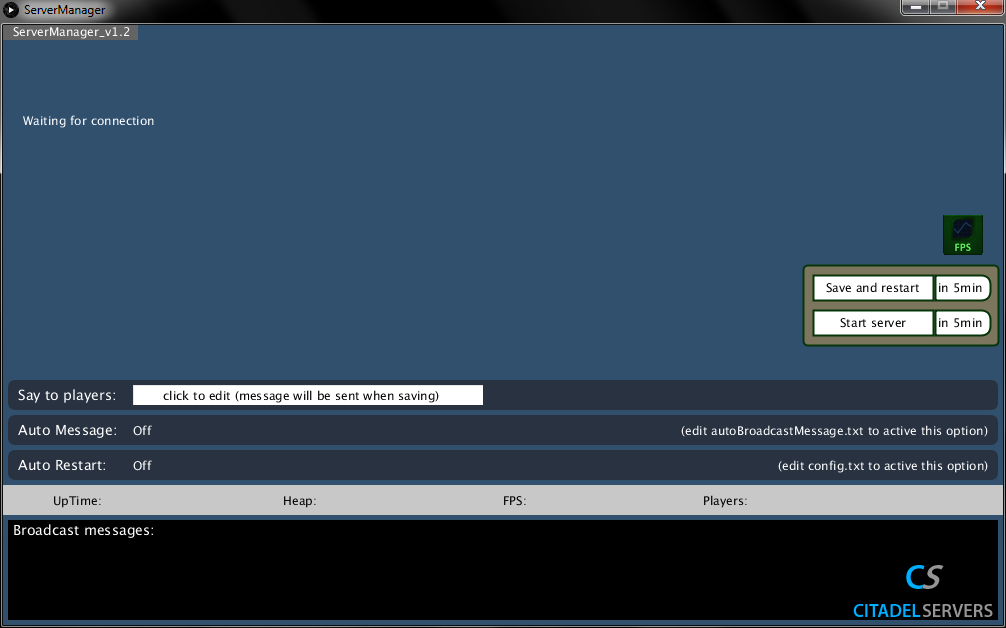
After that, you're all set to monitor and restart the server remotely.

Once done, go ahead and go back to the main page:

Download the "Empyrion Server Manager" via the button in the panel:

Empyrion Server
Manager
Once that's done, start the server

Now load up the Web Console tool

Web Console

What we want from here is the Telnet port, which is highlighted in the image above, so we can connect the server manager to the server.
After you grab the telnet port, open the option.txt file that came with the server manager

Input the ip from "Connection Info:" in the main panel, the telnet port we grabbed earlier, and the telnet password you set for your server.
Step 2: Use The Manager
Now, start the server manager, and you'll see a picture attached below:

After that, you're all set to monitor and restart the server remotely.

